Basket (
 Main Menu


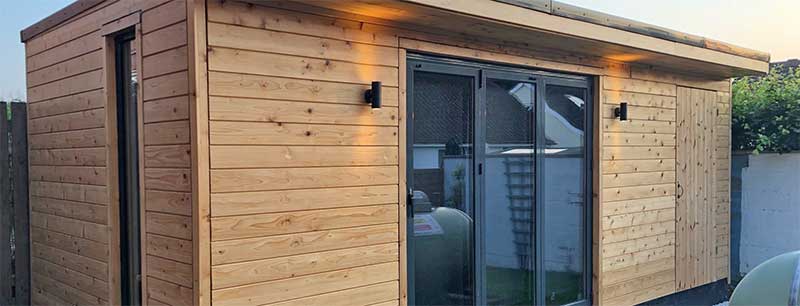
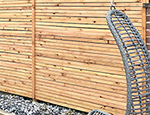
British Western Red Cedar Tongue and Groove Cladding
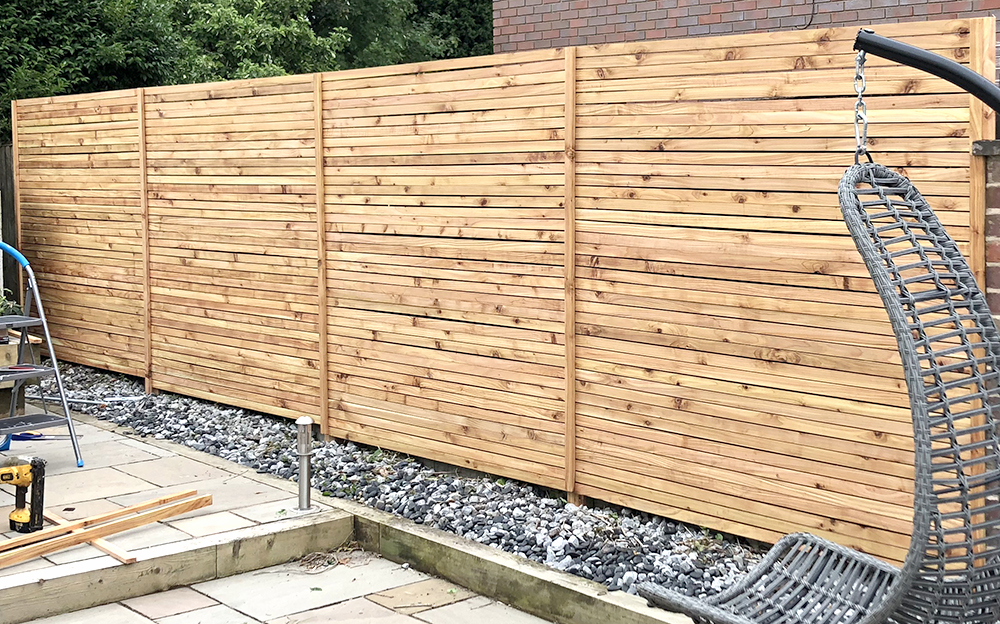
British Cedar Tongue and Groove cladding is creamy in colour and quite knotty compared to the Canadian Cedar.
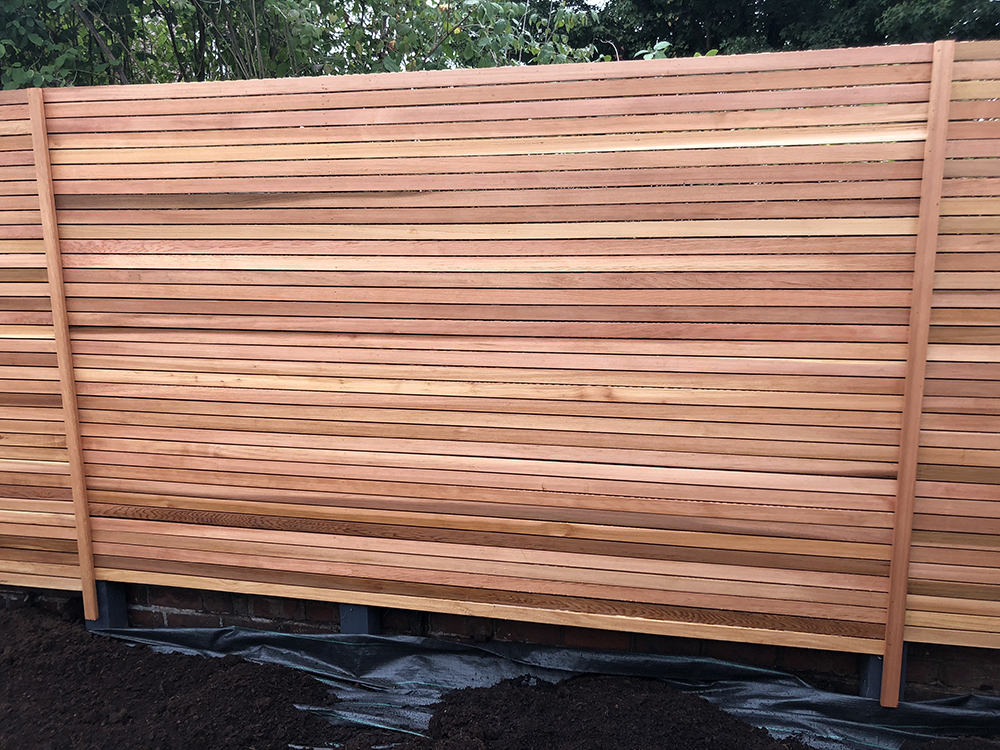
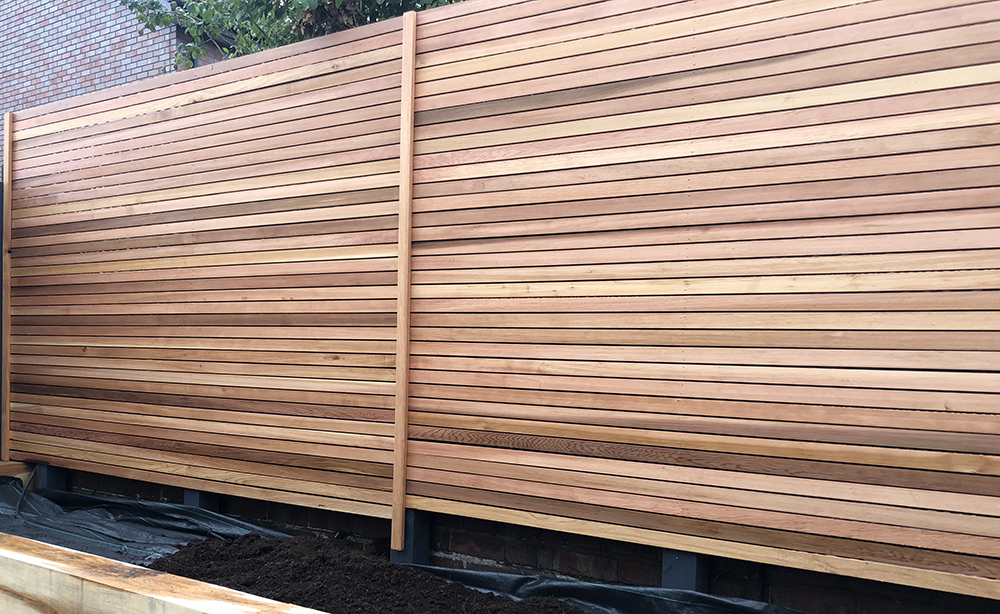
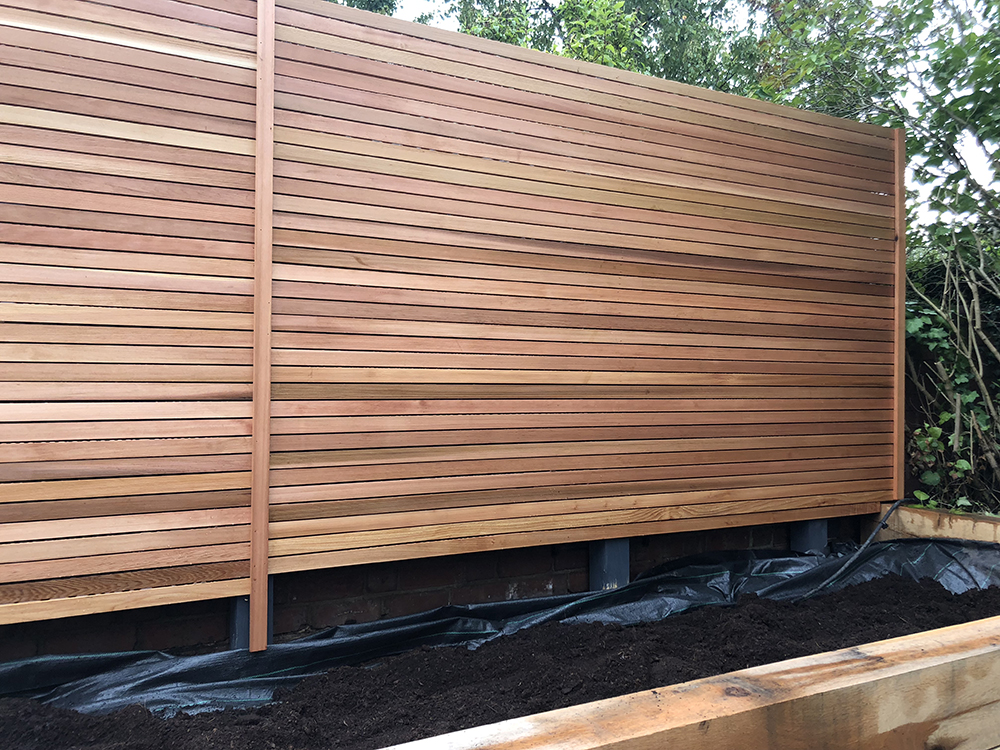
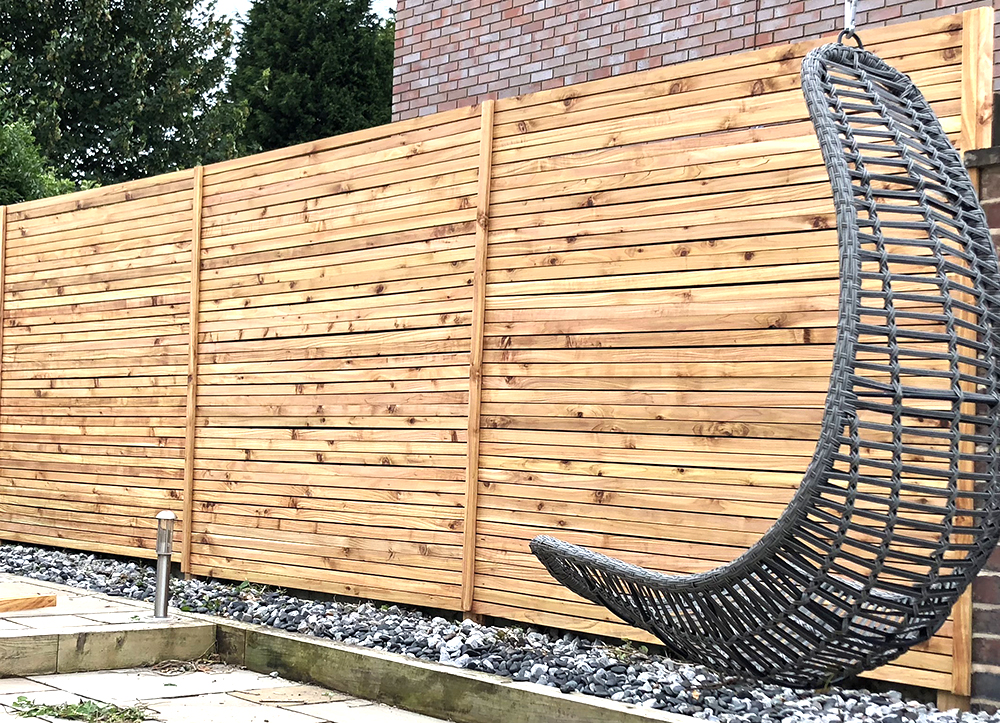
Photo: Treated British Western Red Cedar Tongue and Groove
Work out a Price Below
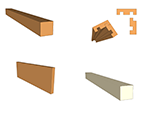
1) Click to choose a Tongue and Groove Cladding profile

2) Click to choose a grade of British Western Red Cedar
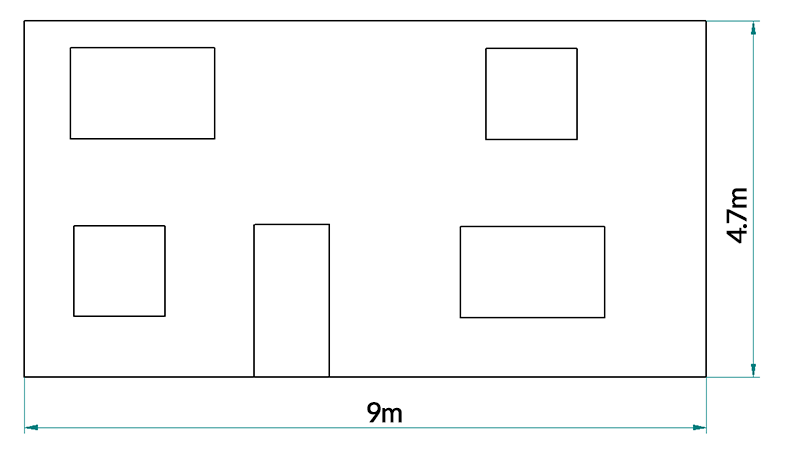
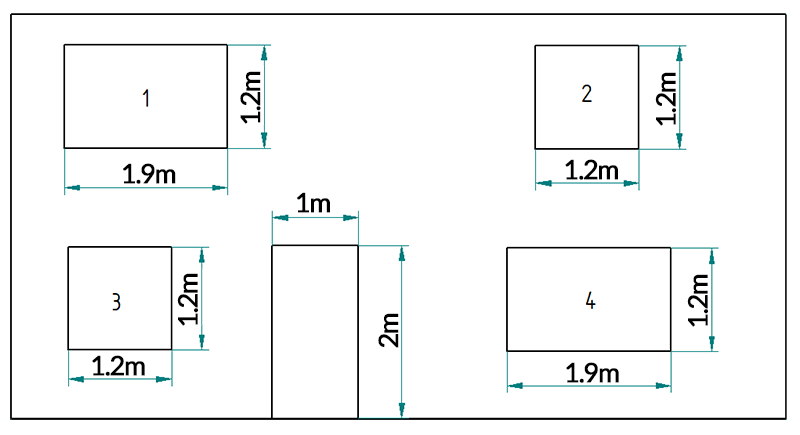
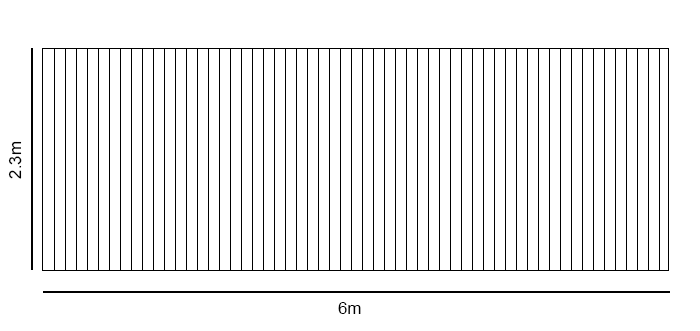
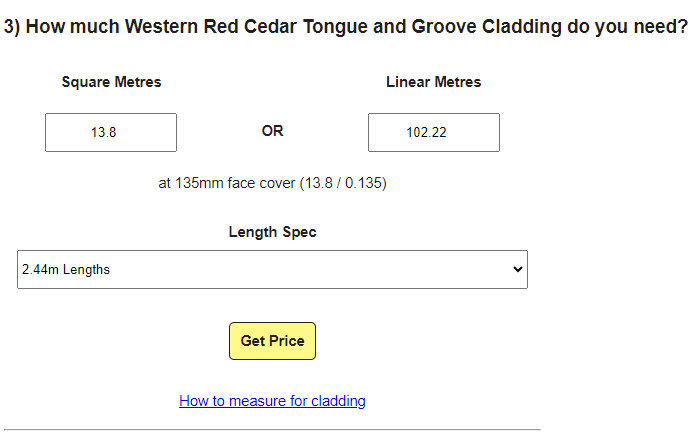
3) How much British Western Red Cedar Tongue and Groove Cladding do you need?
 Added to Basket
Related Products
British Western Red Cedar Tongue and Groove Cladding
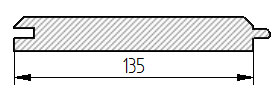
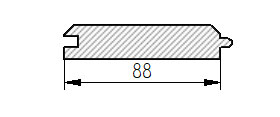
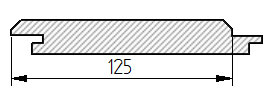
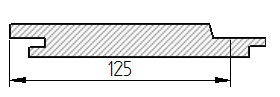
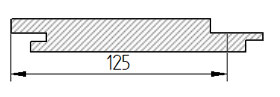
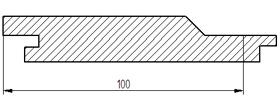
The following five profiles are all available for British Western Red Cedar Tongue and Groove Cladding:
- IWC1 - 19mm x 145mm overall, with a 135mm face - For horizontal or vertical fitting
- IWC2 - 19mm x 95mm overall, with an 88mm face - For horizontal or vertical fitting
- IWC3 - 19mm x 142mm overall, with a 125mm face - For horizontal or vertical fitting
- IWC4 - 19mm x 145mm overall, with a 125mm face - For horizontal or vertical fitting
- IWC5 - 19mm x 145mm overall, with a 125mm face - For vertical fitting only
Most of our T&G profiles are designed to be fitted either horizontally or vertically, only IWC5 is vertical fit only. This makes Tongue and Groove one of our more appealing profiles because you can choose to fit your cladding whichever way you want.
Cedar wood cladding is an excellent product whether it is imported from Canada or grown here in the UK. Both have their pro's and con's which you can find a breakdown of in our Timber Knowledge Library.
There is a growing trend for home grown timbers and they are becoming more sought after than their foreign counterparts. There are management processes in place within British forests which help the conservation of trees which in the long run will help the supply of timber and the environment.
British Western Red Cedar isn’t as vibrantly coloured as its Canadian counterpart and it contains more knots. The timber is provided in the Fresh Sawn Merchantable grade and even though it is fresh sawn the wood is stable enough to be machined into profile.
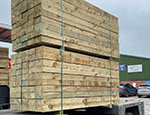
We usually supply cladding in random lengths of over 3m. We can provide exact lengths however we do ask that you call us on 01889 597281 or talk to us on the online chat before ordering. This is so that we can check the availability of the lengths you need. If we can give you the lengths you need then please enter them into the Special Instructions box on the shopping basket page before checking out.
Treatments
Most people leave their timber to go the traditional silver-grey in the sun. We recommend talking to www.wood-finishes-direct.com if you would like to treat your timber. If you do decide to treat your timber, it needs to be treated all the way round including the ends to prevent moisture getting in at all.
Canadian and British Western Red Cedar
Please see below some pictures of planed all round Western Red Cedar slats. Although they aren't pictures of cladding you will be able to see the colour difference between the Canadian and British Western Red Cedar which will help you to make a choice between the two.
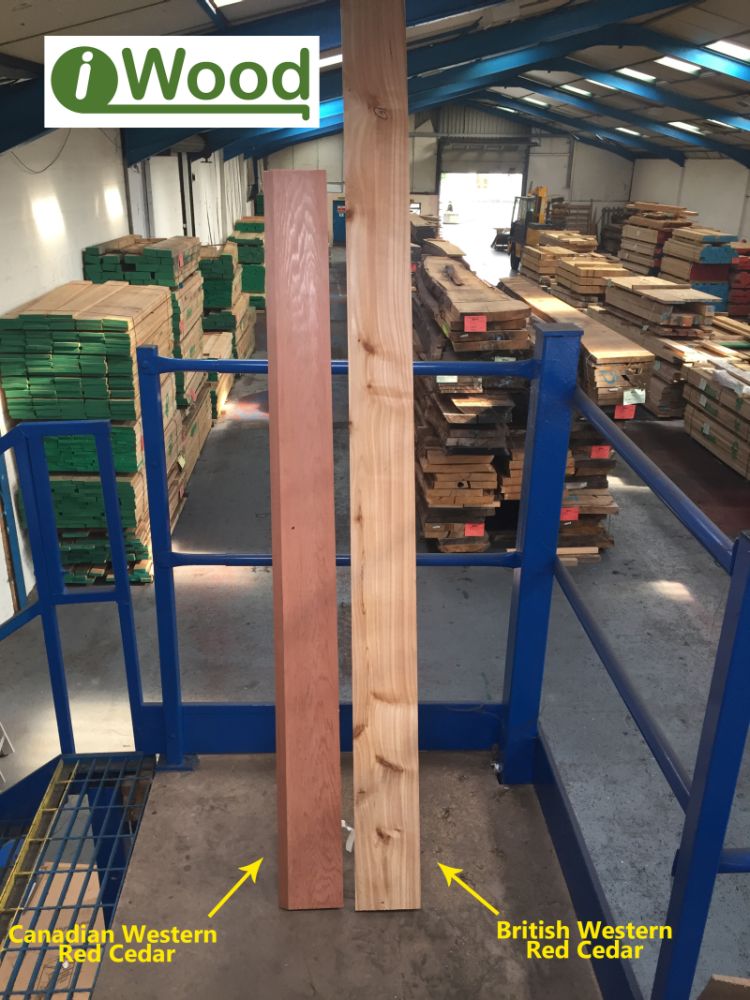
Canadian Cedar
British Cedar
Example Pricing
| Grade | IWC1 T&G 145mm (135 face) x 19mm | IWC2 T&G 95mm (88 face) x 19mm | IWC3 T&G 142mm (125 face) x 19mm | IWC4 T&G 145mm (125 face) x 19mm | IWC5 T&G 145mm (125 face) x 19mm | IWC23 T&G 114mm (100 face) x 19mm | IWC24 T&G 114mm (107 face) x 19mm |
|---|---|---|---|---|---|---|---|
| Fresh Sawn Merchantable Grade Price (ex VAT) | £36.72 / m2 | £38.15 / m2 | £39.66 / m2 | £39.66 / m2 | £39.66 / m2 | £49.57 / m2 | £46.33 / m2 |
- Daniel Morriss
It was so easy.
- Shkumbin Sufa
The quality of the kiln dried oak you sent looks really good & some of the best I have seen in my 9 years of being self employed, so thank you very much for that
- Glenn
Your website, ordering and delivery is the best I've ever seen. We deal with alot of timber companies and I wish everyone was as easy as you!
- Ashley - AJ Firewood and Timber
Stanbrook & Nicholson Ltd have been buying European Oak from iWood since their inception. In our trade it is often difficult to get both service and product quality from our suppliers. iWood have consistently provided us with an absolute first rate product with service to match. A high proportion of our timber purchased comes as cut to size putting our wastage at nearly zero per cent. This also speeds our process of manufacture.
- Ben Stanbrook and Simon Nicholson
Fresh Sawn Merchantable Grade
Product Code: IW-18-44-29-2
Specify: Fresh Sawn Merchantable Grade Cedar, British Western Red External Cladding Tongue and Groove Cladding from iWood Timber
DELIVERY TIMES
Our timber is imported straight from sawmills on the continent. Our usual lead times are therefore 10 to 14 working days.
WHAT ARE YOUR DELIVERY COSTS?
We calculate our delivery costs based on how far away you are from us, to get more information on this please check out our shipping costs page.
DELIVERY DAY
Our delivery lorries visit different parts of the country on different days, so once your order is ready we will work with you to arrange a delivery day for when one of our lorries is in your area. We will always arrange the delivery day in advance with you.
DELIVERY TIMES
We deliver weekdays Monday to Friday between the hours of 8am to 5pm. Our delivery vehicles will have multiple jobs on them which can affect the delivery time to you, depending on factors such as traffic and how long it takes to offload the previous jobs. The driver will call you in advance with an estimated time of arrival to make sure you'll be there.
HOW DO I PLACE AN ORDER FOR CLADDING?
You can place your order online by working out your price above and adding your items to your shopping basket. You can then check out and your order will be processed securely and a confirmation email sent. Once your order arrives in our depot, we'll give you a call to arrange delivery.
CAN I ORDER SAMPLES?
Yes you can, you can order samples of certain timbers at www.iwood.co.uk/sample-request/. If the species you need isn't there please give us a call or talk to us on our online chat.
The timbers shown are planed all round samples and are not profiled.
Call our seasoned sales team on 01889 597 281.
Send us a message through our Contact Form.
Email your cutting list to enquiries@iwood.co.uk.