Basket (
 Main Menu


Siberian Larch is currently unavailable
Due to current circumstances we are not supplying Siberian Larch for the forseeable future. We would like to point you in the direction of British Larch and Thermowood as alternatives.
British Larch Tongue and Groove Cladding
We are sorry for any inconvenience, the iWood team.
Siberian Larch Tongue and Groove Cladding
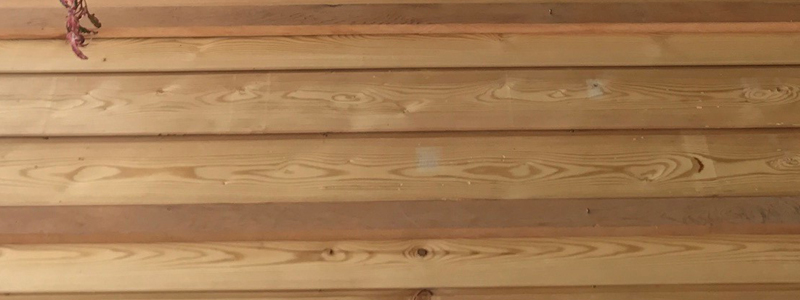
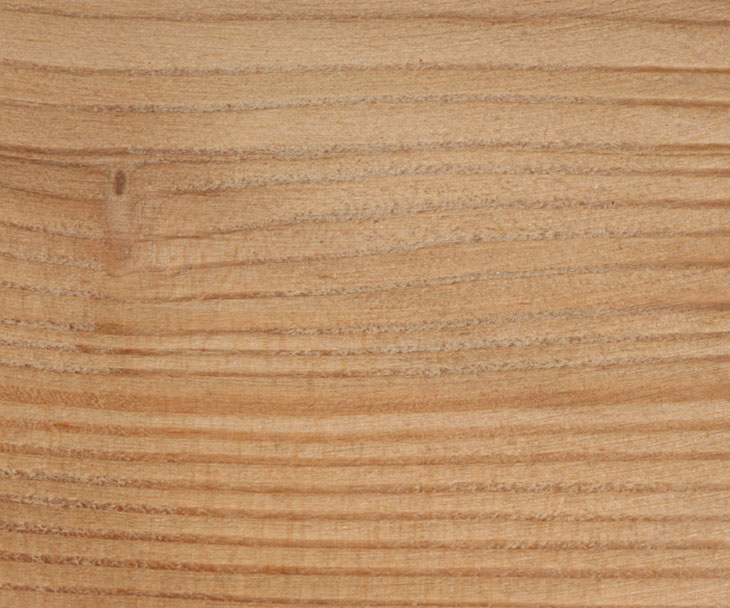
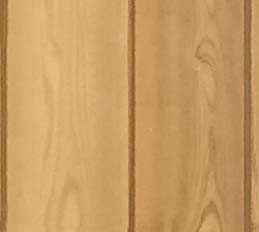
Siberian Larch Tongue and Groove Cladding gives a large grain pattern with few knots.
Photo: Siberian Larch Tongue and Groove
Work out a Price Below
1) Click to choose a Tongue and Groove Cladding profile
2) Click to choose a grade of Siberian Larch
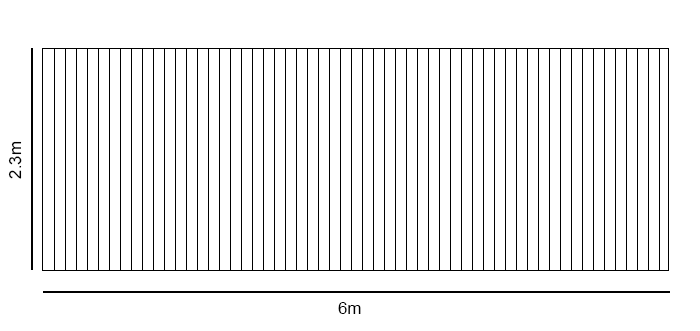
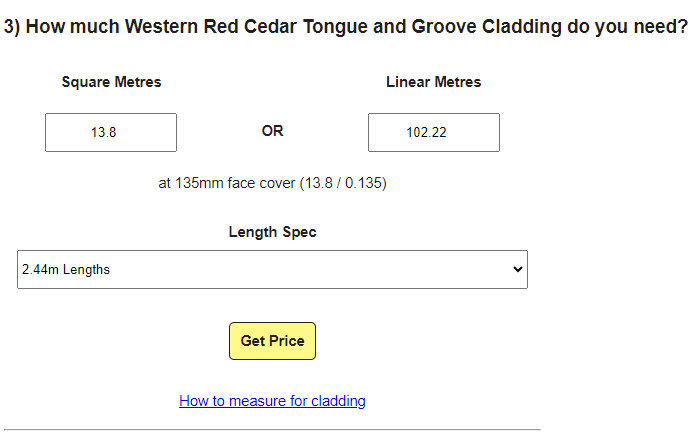
3) How much Siberian Larch Tongue and Groove Cladding do you need?
 Added to Basket
Siberian Larch Tongue and Groove Cladding
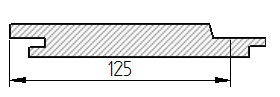
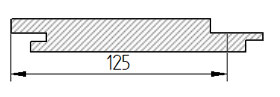
Siberian Larch Tongue and Groove Cladding is available in a range of profiles including:
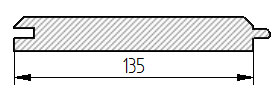
- IWC1 - 19mm x 145mm overall, with a 135mm face - For horizontal or vertical fitting
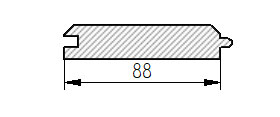
- IWC2 - 19mm x 95mm overall, with an 88mm face - For horizontal or vertical fitting
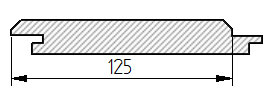
- IWC3 - 19mm x 142mm overall, with a 125mm face - For horizontal or vertical fitting
- IWC4 - 19mm x 145mm overall, with a 125mm face - For horizontal or vertical fitting
- IWC5 - 19mm x 145mm overall, with a 125mm face - For vertical fitting only
With the exception of IWC5, our tongue and groove profiles can be fitted either horizontally or vertically which is entirely your choice.
IWC5 is the only profile which must be fitted vertically. Also, if you want to use secret nailing to fix your cladding you can choose IWC3.
The Larch is supplied in Sawfalling and Unsorted grades and the colour can vary between pale reddish-brown to a brick red. Sawfalling Siberian larch is the lower grade and has a lot of character to it, making it a very attractive timber and its roots in Siberia mean that it is more than capable of standing up to English conditions.
Unsorted Siberian Larch is a lot cleaner in terms of knot content and is the highest we can supply in the UK.
Larch cladding is supplied in supplied in 3m lengths and longer. The lengths of your cladding will be random however where necessary we can try and get the exact lengths you need. If you do need exact lengths we ask that you check with us first (by calling 01889 279 018 or talking to us on the chat) so that we can make sure we can get what you want. If we can there is a “Special Instructions” box on the shopping basket page where you can enter your lengths.
Treatments
Most people leave their timber to go the traditional silver-grey in the sun. We recommend talking to www.wood-finishes-direct.com if you would like to treat your timber. If you do decide to treat your timber, it needs to be treated all the way round including the ends to prevent moisture getting in at all.
- Chris Waterhouse
Pleased with the quality of oak and price, and very friendly and helpful staff when you collect. Thank you.
- Bryan Martin
We thank you once again for the very good service that you offered and we hope to be able to business with you again in the future.
- Gary Crossfield.
The person I spoke to on the phone was very helpful, and the receptionist was lovely. I found the website very easy to use.
- Steven Millar
I'm very happy with the customer service here and will be definitely using iWood again in the future.
- James Marshall
Sawfalling
Product Code: IW-18-21-21-2
Specify: Sawfalling Larch, Siberian External Cladding Tongue and Groove Cladding from iWood Timber
Unsorted
Product Code: IW-18-21-34-2
Specify: Unsorted Larch, Siberian External Cladding Tongue and Groove Cladding from iWood Timber
DELIVERY TIMES
Our timber is imported straight from sawmills on the continent. Our usual lead times are therefore 14 to 17 working days.
WHAT ARE YOUR DELIVERY COSTS?
We calculate our delivery costs based on how far away you are from us, to get more information on this please check out our shipping costs page.
DELIVERY DAY
Our delivery lorries visit different parts of the country on different days, so once your order is ready we will work with you to arrange a delivery day for when one of our lorries is in your area. We will always arrange the delivery day in advance with you.
DELIVERY TIMES
We deliver weekdays Monday to Friday between the hours of 8am to 5pm. Our delivery vehicles will have multiple jobs on them which can affect the delivery time to you, depending on factors such as traffic and how long it takes to offload the previous jobs. The driver will call you in advance with an estimated time of arrival to make sure you'll be there.
HOW DO I PLACE AN ORDER FOR CLADDING?
You can place your order online by working out your price above and adding your items to your shopping basket. You can then check out and your order will be processed securely and a confirmation email sent. Once your order arrives in our depot, we'll give you a call to arrange delivery.
CAN I ORDER SAMPLES?
Yes you can, you can order samples of certain timbers at www.iwood.co.uk/sample-request/. If the species you need isn't there please give us a call or talk to us on our online chat.
The timbers shown are planed all round samples and are not profiled.
Call our seasoned sales team on 01889 597 281.
Send us a message through our Contact Form.
Email your cutting list to enquiries@iwood.co.uk.