Basket (
 Main Menu


British Larch Feather Edge Cladding
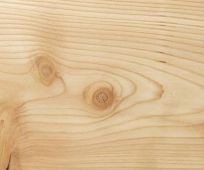
British Larch Feather Edge is also extremely cost-effective. It has a warm, pale, orange colour and attractive grain and knots.
Feather Edge Cladding Needs Installing Quickly to Prevent Cupping and Discolouration
Work out a Price Below
1) Click to choose a Feather Edge Cladding profile

2) Click to choose a grade of British Larch
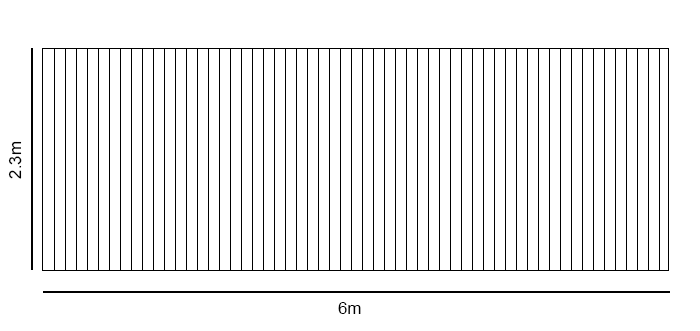
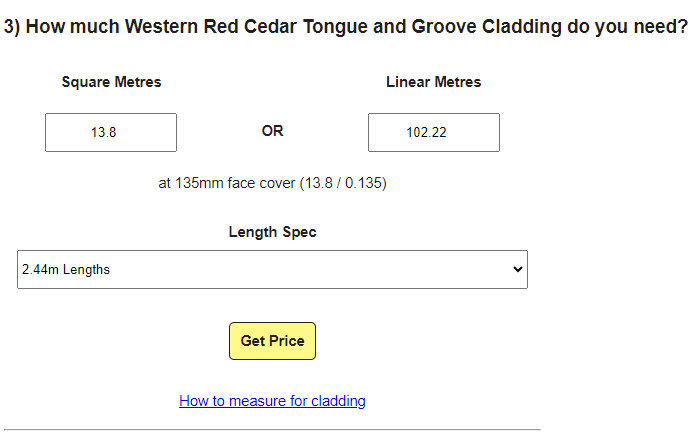
3) How much British Larch Feather Edge Cladding do you need?
 Added to Basket
Related Products
British Larch Feather Edge Cladding
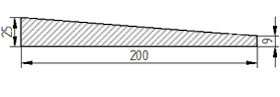
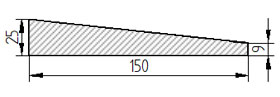
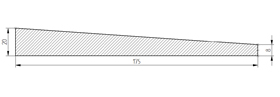
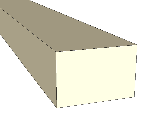
British Larch feather edge cladding is supplied in two default profiles:
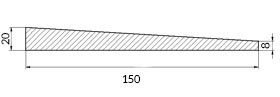
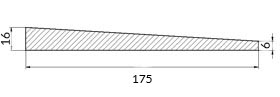
- IWC9 - 200mm wide Feather Edge British Larch Cladding - to be overlapped 25mm giving 175mm face cover
- IWC10 - 150mm wide Feather Edge British Larch Cladding - to be overlapped 25mm giving 125mm face cover
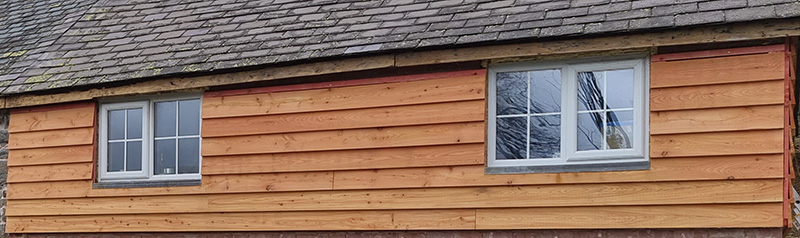
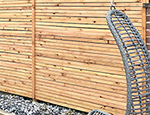
Feather edge is one of the more traditional forms of cladding and is instantly recognisable from its overlapping style.
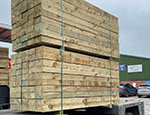
The fresh sawn merchantable British larch cladding we supply is a great feather edge product which is full of character and contains knots. It’s ideal for outdoor use because of its natural resistance to rot.
The colour of British Larch can vary from pale reddish-brown to a brick red which means that you will never get two boards the same which adds to the allure.
The popularity for British timber is on the rise as more people look towards using home grown materials for their builds, and so they should be cause not only British timbers great for an all manner of uses they can also be cheaper. The supply of British timber is becoming sustainable as carefully managed forests look towards maintaining this natural grown resource.
We supply British Larch feather edge cladding in random lengths 3m and longer. If you have any special length requirements please call us on 01889 597281 or talk to us on our online chat to make sure we can fulfil your requirements. If we can then all you need to do is enter those lengths into the “Special Instructions” box on the shopping basket page.
Treatments
Most people leave their timber to go the traditional silver-grey in the sun. We recommend talking to www.wood-finishes-direct.com if you would like to treat your timber. If you do decide to treat your timber, it needs to be treated all the way round including the ends to prevent moisture getting in at all.
Example Pricing
| Grade | IWC9 Feather-edged 200mm (175 face) | IWC10 Feather-edged 150mm (125 face) | IWC19 Feather-edged 150mm (125 face) | IWC21 Feather-edged 175mm (150 face) | IWC22 Feather-edged 150mm (125 face) | IWC18 Feather-edged 175mm (150 face) |
|---|---|---|---|---|---|---|
| Fresh Sawn Merchantable Grade Price (ex VAT) | £15.51 / m2 | £16.29 / m2 | £13.71 / m2 | £10.83 / m2 | £11.14 / m2 | £13.33 / m2 |
Rated 4.2 out of 5 from 35 Google reviews
★★★★★"My first experience using iwood, fantastic service from start to finish. Product arrived as expected in first class condition. sales team kept me up to date with my order progress throughout. Delivery via their regular third party haulage company who were courteous and extremely helpful at point of delivery. First class service with 5 star staff. we will be using them on a regular basis. Well done Team iwood with special thanks to Debbie."
- t pickett, March 2021
★★★★★
"Great company, have used many times now. Good quality timber at the best prices, great technical knowledge and helpful with it, easy collection process."
- chris dale, January 2026
★★★★★
"Great service as always, good selection of oak packs and fast delivery."
- Rcc Furniture, March 2021
Fresh Sawn Merchantable Grade
Product Code: IW-18-18-29-3
Specify: Fresh Sawn Merchantable Grade Larch, British External Cladding Feather Edge Cladding from iWood Timber
DELIVERY TIMES
Our timber is imported straight from sawmills on the continent. Our usual lead times are therefore 10 to 14 working days.
WHAT ARE YOUR DELIVERY COSTS?
We calculate our delivery costs based on how far away you are from us, to get more information on this please check out our shipping costs page.
DELIVERY DAY
Our delivery lorries visit different parts of the country on different days, so once your order is ready we will work with you to arrange a delivery day for when one of our lorries is in your area. We will always arrange the delivery day in advance with you.
DELIVERY TIMES
We deliver weekdays Monday to Friday between the hours of 8am to 5pm. Our delivery vehicles will have multiple jobs on them which can affect the delivery time to you, depending on factors such as traffic and how long it takes to offload the previous jobs. The driver will call you in advance with an estimated time of arrival to make sure you'll be there.
HOW DO I PLACE AN ORDER FOR CLADDING?
You can place your order online by working out your price above and adding your items to your shopping basket. You can then check out and your order will be processed securely and a confirmation email sent. Once your order arrives in our depot, we'll give you a call to arrange delivery.
CAN I ORDER SAMPLES?
Yes you can, you can order samples of certain timbers at www.iwood.co.uk/sample-request/. If the species you need isn't there please give us a call or talk to us on our online chat.
The timbers shown are planed all round samples and are not profiled.
Call our seasoned sales team on 01889 597 281.
Send us a message through our Contact Form.
Email your cutting list to enquiries@iwood.co.uk.